Locating Battery Ground Faults with a BGL

The BGL is used to trace and locate ground faults on a live DC system, without sectionalizing any circuit.

STEPTurn on the BGL. This instrument is battery operated or can be used also connected to the power supply. After turning on the unit the LED “In Progress” will illuminate for a while. If it is being operated from the internal battery the LED “Overrange” will illuminate as well when the charge is over 90%.

STEPTest Lead Connection. Connect the current sensor and output lead set to the instrument.

bglhookup2 BGLhookup

STEPTest Leads Connection to Battery System. The output test lead set should be connected to the battery system in the following order:

  • Connect the black and green ground wires to earth ground for both a ground and safety.
  • Red clip to positive or negative battery bus bar. A small spark may occur when connecting to battery terminals and the LED “Warning > 30VDC” may turn on.
  • Clamp the current sensor around the red cable from the output lead set.

BGL

STEPMeasure total resistance to ground. After connecting the clamp, set the “Function” switch to resistance position, then wait for VALID LED to illuminate.

Verify you can measure the ground fault and note the value.

With the current sensor around the red cable of the lead set, the instrument will measure the total parallel resistance to ground of the battery system. This includes all leakage paths from positive and negative side. If this resistance is in excess of 10 Kohms, the chances of finding any problem is limited.

STEPMeasure resistance of each branch. If the total resistance measured in step 4 is below 10 Kohms the next step is to measure the resistance of each branch of the system to trace down on which is the fault or faults. Troubleshoot the lowest resistance branch first.

To measure the resistance of each branch disconnect the clamp from the red cable of the output lead set and clamp it to the first branch to be measured, wait for “Valid” LED to illuminate and take note of the resistance to ground of this branch. Repeat this for all branches and compare them to determine which branch has the lowest resistance.

Once a branch has been identified further measurements should be done downstream of it to locate the specific point of fault in the branch.

STEPTerminating measurements. Once a particular panel has been measured and you need to move to another panel or you have completed the test, the instrument needs to be disconnected. To remove the test leads follow the sequence below:

  • Remove the clamp from the branch
  • Disconnect the red clip from battery bus bar. If the “Warning > 30VDC”LED illuminates, connect the red clip to ground until the led turns off.
  • Disconnect the black clip from ground.
  • Disconnect the green clip from ground.
  • Turn off the unit and disconnect it from the power supply if it is being used.

THE BGL

Simplify fault location. This instrument was developed to detect, track and locate ground faults on battery systems – without resorting to sectionalizing! Model BGL tracks and locates ground faults on live or dead battery systems. To save hours of unnecessary troubleshooting, the BGL readily differentiates between the resistive fault currents and capacitive charging currents. This feature allows the instrument to detect and track leakage paths, even in the presence of surge-suppression capacitors.

Request more information

BGL Datasheet

Free Battery Testing Guide

10 ways grounding can be positive

As a kid, being grounded is a negative. We don’t get to watch our favorite show on TV or visit a movie theater to see “The Avengers” with our friends. As an adult in the power industry, being grounded becomes quite the positive. In fact, being grounded is one way to keep that favorite TV on and that favorite movie playing by preventing a short-circuit catastrophe within the electrical system. A good protection system relies on low-resistance electrical paths to assist relays when there’s a fault in play. In simple terms: grounding this stuff help keeps your TV on.

Electrical ground or putting a good overall grounding system in place—one that protects both your personnel and your infrastructure—takes a bit of forward thinking. You’ve got to examine weather issues, safety issues, mathematics and dirt. Yep, just like when you were a kid, you get to go back to playing in the dirt.

While this is, by no means, an extensive or complete step-by-step guide to electrical grounding and earth resistance testing, do keep these ten items in mind.

1. For comprehensive coverage, it’s all about the soil. We tend to think of dirt as a rather basic, single element. The truth is, there are all kinds of dirt: rocky, clay, sandy. And, just as each of those categories can impact growing plants in the dirt, it can also impact electrical resistance. Generally speaking, all soil has some electrical property, just as your body does. But, on the whole, dirt’s a rather poor conductor—at least, it’s not as good as, say, copper wire. Still, get yourself a big enough path, and even dirt can be a decent conductor. And, helpfully, it’s everywhere. Unfortunately, there’s a lot of geography in this step. You don’t need to know just the type of soil, you need to know stratification, moisture, temperature and chemical composition to figure out the resistant factor and your needs. Never was playing in the dirt so darn complicated. (See table.)

2. Send people who know stuff. Knowledge is the most effective tool for all types of field work, and it becomes that much more valuable in applications where variables are as large and uncontrollable as they are in ground testing. Bottom line: This is important. So, don’t send a rookie. Don’t think, “Eh. It’s not that difficult. How much trouble can he get into?” The fact is: Grounding isn’t as simple as banging a metal pole into the earth for testing. And electricity is dangerous. Send the pro. He can bring the rookie.

3. Do a dry run. Assess the site and recent conditions. Take a look around before testing. Get the lay of the land and take a look at weather cycles as well. This will help you make an educated decision as to where test results may fall in the min/max testing cycle. Then, proceed accordingly. At the least, arrangements should be made to retest at a suspected worst time.

4. Pay attention to schedules when it comes to maintenance. If a maintenance schedule is established, be judicious about the interval. Those are important. Don’t let those times lag and maintenance fall by the wayside. For most electrical maintenance, a regular schedule—for instance, annually or semi-annually—is the order of the day.

5. Forget schedules when it comes to ground testing. Testing at regular intervals will result in readings being taken under the same general weather conditions year in and year out. If these are optimal times of year, a false sense of security can develop. Instead, test at irregular intervals, like 5, 7, or 11 months, so that all times of year and all weather conditions will be evaluated. A “worst case” will be recognized and, if necessary, the grid can be expanded or improved so that there will be no unpleasant surprises—no shocks, if you will. If you don’t know what your ground is like in every season, you’re doing yourself a disservice.

6. Don’t fear the winter. Testing in every season means that, likely, you’ll get to work when your fingers are freezing, when there’s a storm watch or, even, when it snows. But, being methodical and thorough will prevent the cold from impacting your tests. First, the steps: the test rods must be driven through the frost layer. Then, the ground tester must establish a minimum amount of current through the soil in order to meet its measurement parameters and to sense the voltage drop across the measured resistance. (Modern testers include indicators that will warn the operator if these parameters are not being met.) Additional measures must then be taken, such as driving deeper rods, to bring the test setup within specifications. (Pouring hot water provides only a marginal temporary advantage and may backfire by freezing solid around the probe and making it nearly impossible to remove.) But, once an adequate setup is accomplished, testing under snow is just as reliable as at any other time.

7. Sometimes snow can be an advantage. We know it seems unlikely. But, when snow falls early in the season, before the first major frost, it may thermally insulate the ground and limit frost penetration to more workable depths, say 6-8 inches. If snow has been plowed or drifted away, frost penetrates deeper and test results may be rendered less consistent. Testing under snow can actually be more reliable. Just shovel away an area large enough to drive the test rods.

8. Don’t be a wet weather hero. No one is likely to want to perform a ground test in a driving rain or with lightning about, even if miles away. Well, no one sane. Besides, Benjamin Franklin already did that dangerous bit of testing for electricity; no need to repeat this. Don’t even think about it. So, dangerous conditions are to be avoided because of the risk to the operator. Dangerous voltages developing on the power lines can also be transmitted through the grounding system and will appear at the terminals of a tester if a test is in progress.

9. Consider the instrument. But aside from those extreme Benjamin Franklin circumstances, ground testing can be performed on moist or rainy days. The sudden appearance of a slight shower shouldn’t set you on a dead run to the truck as long as you’re working with the correct instrument for your environment. The determining factor here is the IP rating of the instrument.

10. Mind your “I”s and “P”s. This IP rating should be available in the instrument’s specifications and is commonly referred to as Ingress Protection. IP ratings were established by the International Electrotechnical Commission (IEC) in Standard #529, and provide a means of evaluating the effectiveness of an instrument’s casework in keeping out dirt and moisture. The IP rating consists of two numbers and both cases, the higher the better. The first number indicates how well the instrument is sealed against particle invasion, with six being “dust tight.”

Quarries and mines are particularly bad environments in this regard, while a steady wind in a dusty environment can also pose a hazard to the instrument. The second number in the rating refers to moisture ingress, with eight, the highest rating, translating to “continuous immersion.” Since ground tests are not performed under water, this would be overkill. But note the IP rating and obtain an instrument that is adequate to the rigors of your fieldwork.

Armed with soil and weather knowledge, experience and a good instrument, the skilled technician will finish that ground test in no time flat—well, unless he has to shovel some snow first.

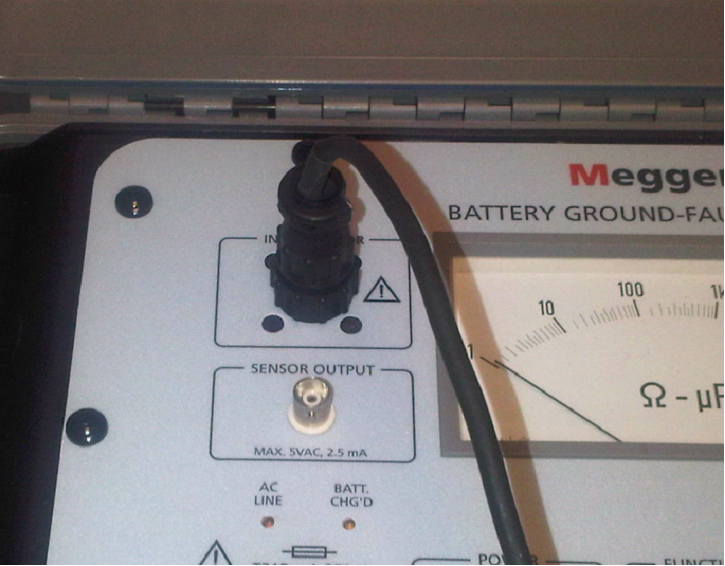
Browse Megger ground testing equipment

Don’t take a chance on your CAT

When testing electrical systems of any kind, it’s essential to make sure that the test equipment being used is suitable for the task in hand. If it’s not, there is a significant risk not only of damage to the test equipment and the installation, but also of injury to the user. That probably seems so obvious that it’s hardly worth mentioning. After all, how many technicians or engineers would use unsuitable equipment for testing? The answer is that few would do so knowingly, but many may be doing so every day without even realising that there’s a problem. And that problem relates to transients. All electrical installations experience transients, which are voltage spikes that are super-imposed on the normal supply. Although these spikes are usually of very short duration – typically they last just a few microseconds – their amplitude can be thousands of volts. These transients come from a variety of sources, but one source that is surprisingly common even in temperate climes is lightning strikes. Note that a direct hit on the installation doesn’t have to be involved, nor even a hit on the power lines supplying it; a nearby strike is often enough to produce a large transient.

electricaltester201307CAT

But what have transients got to do with testing and safety? To answer this question, let’s examine what happens if you’re carrying out a test – which could be something as simple and routine as checking the voltage of an LV supply – when it experiences a transient. If the instrument in use has not been specifically chosen to be suitable for the type of work being carried out, there’s a very real risk that the transient will cause a flash over inside the instrument and set up an arc.

Because its duration is very short, the transient itself is unlikely to have enough energy to do a lot of damage. Unfortunately though, once it is established, the arc provides a low
impedance path for current from the mains supply. That current flow releases a lot of
energy inside the instrument. Of course, the circuit’s protective device, whether it’s a fuse
or circuit breaker, will quickly disconnect the supply and interrupt the fault current.

Before this has time to happen, however, the energy released within the instrument is enough to cause real problems. In the worst cases, the instrument may explode, injuring or even killing the person who is using it. Even in less severe cases there is a definite risk of fire and damage to the equipment under test as well as to the instrument itself.

It’s clearly important, therefore, to choose an instrument that has been designed to withstand the level of transients it’s likely to encounter in use. But how can you tell? The
answer is to look at the instrument’s category rating, which is more commonly called its CAT rating.

CAT ratings are defined in the IEC 61010-1 standard, and are specifically intended to address the issue of transients in the testing of low-voltage installations. To understand how the ratings work, it’s necessary to look at what happens to transients as they pass through a typical electrical installation.

Outside the building and at the point where the mains supply enters the building, the transients have their highest amplitude. For testing in these locations, only instruments with a CAT IV rating are suitable. Transients are, however, quickly attenuated by the wiring and equipment in an electrical installation. Once the supply has passed through the main switchboard, therefore, the amplitude of the transients is much lower, and instruments with a CAT III rating (or higher) can be safely used. At the final circuit outlets, the transient levels are lower still, and CAT II or higher instruments can be used without problems.

What about CAT I instruments? These are for use within appliances such as VDUs and photocopiers. In practice, major suppliers of instruments designed for professional use are
unlikely to offer CAT I or CAT II instruments, as their area of safe usage is so limited. That’s not quite the whole story, as CAT ratings must always include a voltage – for example, CAT IV 300 V. This voltage is the maximum RMS phase-to-earth voltage of the system on which the instrument is suitable for use. This means, for example, that instruments with a 300 V rating can be used on singlephase systems up to 300 V and three-phase systems up to 520 V, making them suitable for the vast majority of low-voltage applications.

There’s one final point to mention. It would be easy to think that insulation testers and other instruments designed for use on dead circuits didn’t need a CAT rating. Remember, however, that these instruments could be accidentally connected to a live supply, and also that many of them incorporate facilities for some live circuit tests, such as measuring the supply voltage. The CAT rating is, therefore, still relevant for these types of instruments.

Once the significance of the CAT rating system is understood, it’s not difficult to choose an instrument that’s appropriate for the type of work being undertaken. As a general rule of
thumb, a CAT III 300V rating is likely to be the minimum acceptable for general use.
It is, however, well worth considering investing in CAT IV instruments, as these can be used without restrictions anywhere within a normal installation. Many utility companies
and other major purchasers of instruments are, in fact, now specifying CAT IV instruments as standard, since they deliver an extra level of safety in return for a very modest additional investment.

By Simon Wood, Megger UK wholesales and distribution sales manager. Excerpt from the July 2013 edition of Megger’s Electrical Tester.

TM1700 tattles on your circuit breakers: Are they ready for the trip?

Thomas Edison used to dream about circuit breakers, sketching them into power infrastructure patent applications in “what if” and “if only” scenarios, but the only practical thing he had to work with then was a fuse. While circuit breakers had been invented well before Edison’s reign over electrical infrastructure, the ones he knew of weren’t very practical. In fact, circuit breakers didn’t evolve into their current, practical powerhouse design until well into the 20th Century—beyond Edison’s reach for that first bit of electric infrastructure.

Now that Edison’s dream has come true and the circuit breaker is a modern and necessary part of a robust protective infrastructure for power, however, there remains one overwhelming issue with them: Will they work when they’re supposed to?

The knowledge that your circuit breakers are ready for a trip—not packed, necessarily, but certainly prepared—is an invaluable element of any power protection scheme. Megger’s latest circuit breaker analyzer series, the TM1700, will help you test those circuit breakers, making sure that Edison’s favorite fantasy works like a dream.

Megger has more than 25 years of experience in the field of circuit breaker analysis—a fact the company is deeply proud of. In fact, Megger has a long history of working intimately with circuit breaker manufacturers, which gives them an edge: Megger understands the special requirements of the power industry field worker or the manufacturing complex operator and has created features designed for industry-specific conditions and unique industrial application scenarios.

With this specialized knowledge, Megger regularly introduces new technologies and test methods that become industry standards; the TM1700 is no different.

Overview of the TM1700

This series utilizes some of the ground-breaking technology from the top-of-the-line version TM1800 series of circuit breaker analyzers but puts that technology into a more affordable, more grassroots package. The TM1700’s robust design places powerful technology in the user’s hands, allowing him to achieve efficient and reliable circuit breaker testing in any environment. Additionally, galvanically-isolated inputs and outputs make it possible to perform all relevant measurements in a single test, eliminating the need for new set-up and re-connections. (These particular inputs time both wet and dry contacts independent of polarity and without the need for input configuration. If the contact isn’t galvanically-isolated, it can only be used on wet contacts having the same common.)

Applications for the TM1700 include first trip measurement, coil currents, control voltage and contact timing tests. Additional tests may include auxiliary contact timing, vibration, motor currents, dynamic resistance measurement and motion.

Within the 1700 series, there are four models from PC-remote-controlled to fully stand-alone. All models can be managed from a computer using the well-proven data management and analyzing software CABAWin. Additionally, the patented DualGround™ method makes the testing safe and time-saving by keeping the circuit breaker grounded on both sides throughout the test.

The timing measurement inputs are using a patented active interference suppression algorithm to ensure correct timing and accurate PIR (pre-insertion resistor) values even at high-capacitively-coupled interference currents. (We bet Edison never even dreamed of that one.)

The adaptive and easy-to-use software supports the user, who can perform the test by simply turning the test switch without the need for settings. The operator is only one click away from advanced help functions such as connection diagrams, and the 8” color touch screen (with on-screen keyboard) allows the user to efficiently operate this high-level user interface.

Details of the TM1700

The TM1700 fundamentally serves the purpose of replacing the TM1600, which is being discontinued. The TM1700 has all the functionality of the TM1600 and builds on its predecessor in many capacities. The operator of any TM1700 model may control the analyzer either locally or remotely. Additionally, the TM1700 comes with an optional patent-pending current source for static and dynamic resistance measurement (SRM/DRM). Many analyzers use only one current source, requiring operators to string long, heavy leads and climb up and down ladders or use basket lifts to make changes for each interrupter. None of that is necessary with the TM1700.

The TM1700 series possesses high-resolution analog channels with 16-bit A/D converters (well above the industry standard 12-bit), giving the TM1700 a leg-up on resolution, and 40 kHz sampling rate on all channels where the industry standard is 10 kHz.

The multi-functional breaker control unit on the TM1700 allows for independent control of pulse generation per phase and automatic coil resistance measurement; offers dedicated automatic control voltage measurement (as stated in IEC 62271-100) and individual external coil current measurement per phase using an optional clamp-on CT (perfect for close coil current measurement when there is a X/Y relay in the circuit). It analyzes independent coil current measurement per phase and measures auxiliary contact timing automatically during standard close-and-open operation recordings.

The advanced vibration analysis, using voice recognition algorithms, allows for a non-invasive and time-saving peek into the condition of your equipment.

The TM1700 also offers a special timing measurement method dedicated to circuit breakers with graphite nozzles (rather than the traditional tungsten arcing contacts). This is a rare and unique feature in the TM1700 arsenal.

Even Edison would be enthralled with all the advanced details available in the TM1700 circuit breaker analyzer series from Megger.

More on the 1700 here. Just click.